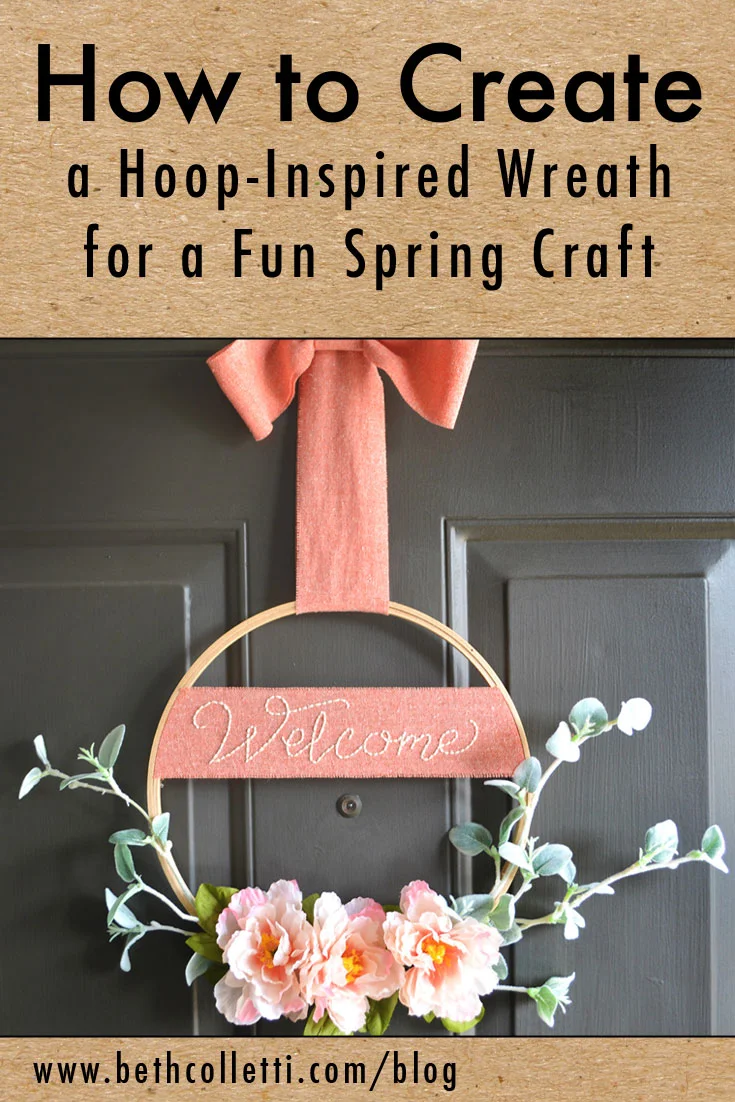
With spring finally here I know I’ve been browsing the craft stores like crazy, wanting to decorate with allthethings. That’s why today I’m excited to share with you a guest post by Katie Brim! Katie is an embroidery artist living in the midwest and I just adore her nature-inspired hoop art. When I saw this beautiful embroidery hoop spring wreath on her @katieheffren.art (formerly @katiedidandco) Instagram feed, I asked her if she’d be up for writing a tutorial, and she graciously agreed! I hope you have fun digging into this spring project - I can’t wait to create a wreath for myself!
Supplies:
10” Embroidery Hoop
Fake Flowers & Greenery - I purchased mine at Michaels
2-1/2” Cotton Ribbon - I purchased mine at Michaels
Hot Glue Gun & plenty of extra glue sticks
Needle
Embroidery Floss
Chalk pen or water soluble pen
Scissors
Directions:
1. Take the 2-1/2" inch ribbon and cut off approx. 12” section and trace the “Welcome” pattern onto the ribbon using the chalk pen or water soluble pen. Download the Welcome pattern here.
2. Stretch the ribbon across embroidery hoop. I placed the ribbon in my hoop about 3/4 the way up.
3. I used the backstitch to complete the pattern on the ribbon.
4. Once I completed the stitching I checked that the ribbon was straight, then cut off the extra on the back of the hoop, leaving about 1/4”, and used the hot glue gun to affix to the inside of the embroidery hoop.
5. Next I arranged the leafy greens on the side of the hoop, leaving space in the middle for the pink flowers. I tried to plan out how I wanted to arrange the greenery and clipping off branches where I needed prior to gluing it down. Once I was happy with how it was laying I glued everything down with the hot glue gun. You could probably use floral tape/wire for this but I decided I’d use what I had on hand, and I used a TON of glue and really gooped it on.
6. The flowers came next. I clipped off the dark green leafy part first and glued that down so I could arrange it so it was easier to see. The easy part after that was gluing in the flowers. I tried to bunch them so that there weren’t any gaps.
7. The trickiest part for me was figuring out how to hang the wreath! After some troubleshooting I decided to cut off about 12” in length of ribbon and loop it through the top of the wreath, then sewing the ends together.
I recommend using a coordinating thread so the stitches don’t show up, but for the purposes of this tutorial I used a color you could easily see!
Also, the length of your ribbon will depend on how far down you want it to hang on your door hook, so check the length with your hook before you cut.
8. After that I created a simple bow by cutting about 10” of ribbon and overlapped the ends and sewing large stitches through the width, then pulling to gather the sides together.
9. I then cut of about 2” piece of ribbon and folded in half, wrapping it around the middle of the bow. Sewing the ends of the loop together in the back of the bow.
10. Finally I added two long stitches to the back of the bow loop to use as a hook and then sewed the bow to the long ribbon attached to the wreath. You could probably also just loop some wire through instead, but again I just used what I have on hand.
I had so much fun making this and I found that the supplies needed for this were pretty reasonably priced compared to most store-bought wreaths. I hope you all try this wreath out and share your creations! It is super easy and I completed it all in an afternoon. It definitely makes for a fun spring craft!
Katie loves creating embroidery art and sells her work on Instagram (@katieheffren.art). She is often inspired by nature and her native Pacific Northwest. Katie is a recent transplant to Kansas, and recently married to her handsome minister husband, David. In her free time she enjoys hiking, coffee drinking, creating anything that pops in her head and making silly bets with her husband. You can get in touch with Katie on Instagram!


