(From time to time I will use affiliate links for products that I love, or that I think you will find useful. Should you choose to purchase with the provided links, I will receive a small commission from the companies I work with at no cost to you.)
One of the fantastic things about hand embroidery is that it’s a versatile craft that can be stitched on all sorts of textiles in your home and life. Adding a bit of embroidery to clothing can give it new life, whether you are using it for decorative purposes, or to creatively patch it to increase its longevity. But what sort of stitches are best to use on clothing? Whatever stitches you choose, it’s important that they hold up to repeated washing (and possibly machine drying) as well as wear and tear of daily use, so there are a couple of things to keep in mind before you select your stitches.
A note on fabric…
Not all clothing is created equal and some fabrics are much easier to stitch on than others (I review fabrics that are great for stitching in this article.) When it comes to clothing, woven fabrics (like cotton poplin, cotton lawn, denim or linen) are much easier to stitch on than knit fabrics (like t-shirts or athletic clothing), which tend to be stretchy. Knit fabrics can be embroidered, but they require some special prep and aren’t great for all stitches. Don’t worry - I’ll be detailing stitching on knits in my next article!
And now on to those clothing embroidery tips!
Use smaller and shorter stitches.
Stitches on clothing will need to move and flex with the fabric, rather than staying taut as they would in an embroidery hoop. As a result it’s best to stick with smaller or shorter stitches when embroidering - aim for between ⅛” and ¼” (4-6 mm) in length. A long straight stitch, for example, will look floppy on clothing, so switch it out for back stitches or another line stitch. And instead of using a satin stitch over a large area, try long and short stitches instead.
Skip delicate stitches.
Some stitches, like the spider wheel rose, look beautiful as wall art, but won’t work so well when they go through the laundry. Because all of the stitching is woven on the top of the fabric with the thread laying delicately in place, it could easily get displaced during washing. Whatever stitches you choose, make sure they are adequately secured and won’t get pulled out, tangled, or lose their shape in the wash.
Take care with loopy stitches.
While you don’t necessarily need to avoid loopy stitches, such as detached chain stitches or uncut turkey work, do keep your stitches small as noted above. Also, be aware that it might be best to wash your items separately or in a delicates bag so that no other items, like clothing with buttons or zippers, can catch on the loops while being washed and potentially damage your embroidery.
Watch your tension.
While you can use an embroidery hoop while stitching your clothing, sometimes I prefer not to because it gives me a more accurate view of how my stitches will look on the fabric. When you are stitching art for the wall, you want your stitches to be nice and taut whereas if you pull your thread too tight while stitching clothing, it will cause puckering and the fabric won’t lay right on your body. So be sure to pull your stitches just tight enough for the fabric and stitches to lay flat. You don’t want fabric to pucker, but you also don’t want your stitches to be loose and floppy.
Secure your stitches with knots.
Knotting thread when embroidering isn’t everyone’s preferred method, but it is really important for keeping your thread secure when you’re stitching clothing. Knot your thread with a ½” (13 mm) tail both at the beginning of your stitches, and when you are ending your thread, keeping everything securely in place. If the coarseness of the back of the stitching bothers your skin, try fusing Pellon Ultra Weave Fusible Embroidery Stabilizer or a similar product over the back for a softer texture.
Ideas for what you can embroider…
You can stitch any number of motifs, such as florals, onto your clothing, but there are many other ways to add embroidery to your wearables too. Sashiko, a type of traditional Japanese folk embroidery, is a beautiful way to mend or decorate your clothes with geometric patterns. Or learn an assortment of unique and decorative stitches to embroider around clothing hems, cuffs, pockets, or necklines to create beautiful abstract details. You can even cross stitch a motif onto your clothes by basting waste canvas to your fabric and then removing it when finished. Appliqué and beading offer even more ways to embellish your clothing with the help of embroidery, and you can explore lots of modern projects in the Alabama Stitch Book.
How to care for embroidered clothing…
For me, how I wash my embroidery depends on how durable my stitches are and how I normally wash a particular item of clothing. I do recommend washing your embroidery in cold water to minimize the risk of bleeding colors. Good quality threads are generally colorfast, but every once in a while you do get some staining. I don’t hesitate to throw the jeans and linen vest I’ve embroidered in the dryer, but I tend to air dry my more detailed embroidered t-shirts. I also wash more intricate stitching on a delicate cycle (again in cold water). As mentioned above, you can also wash your embroidery in a delicates bag if you are concerned about the stitching getting damaged by other items in the wash.
About my project…
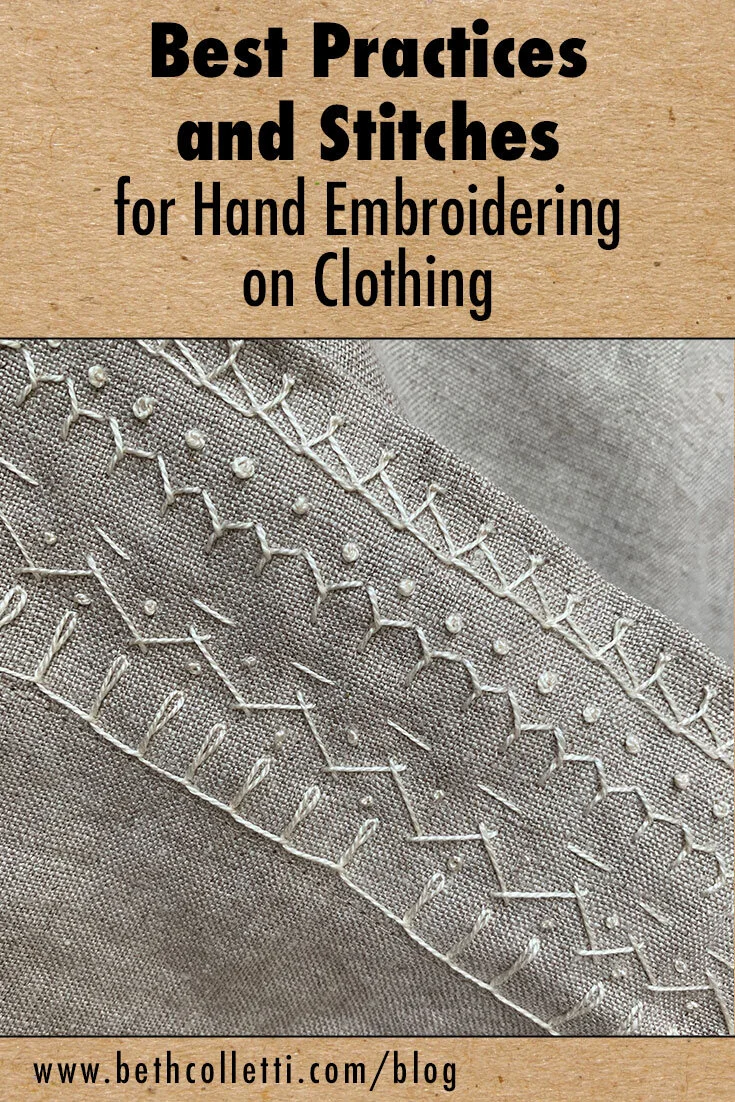
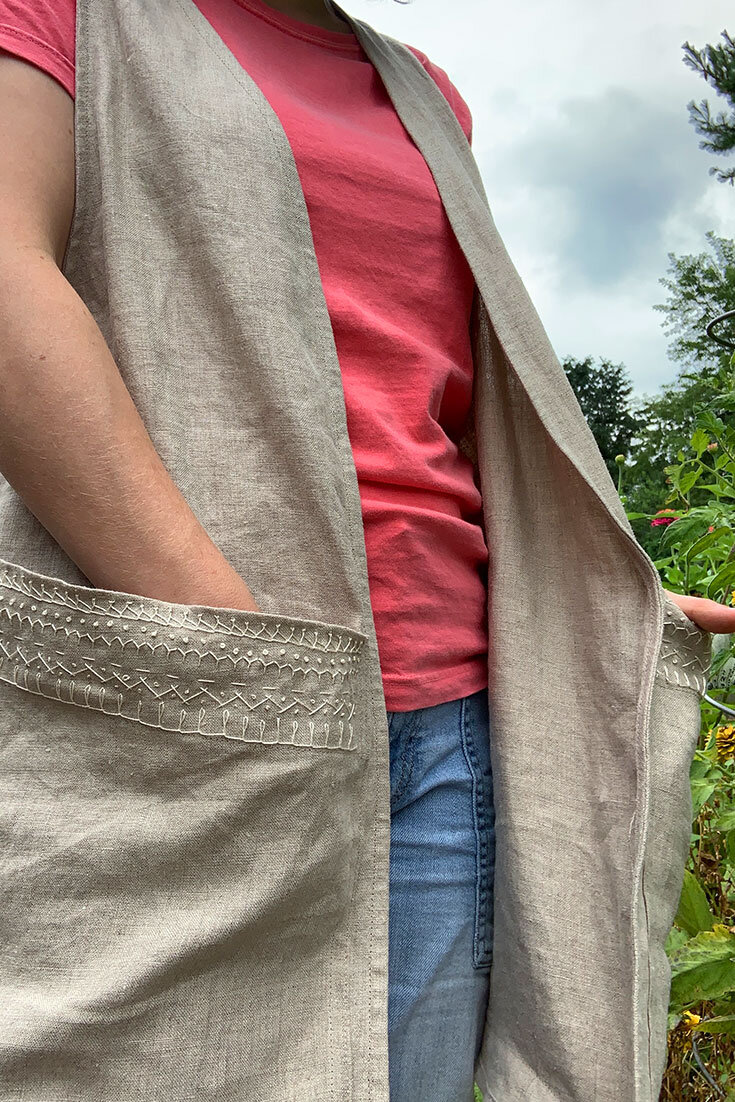
In my last article, I shared a bit about how one of my current life-giving activities is finding empowerment through sewing. This forager vest pattern by Sew Liberated was the very first clothing pattern I ever followed! I was very proud of myself when I finished sewing this project with some leftover linen I had. The pockets are so nice and big (and great for gathering veggies from my garden!) that I knew I wanted to add some embroidery on them. So I took the opportunity to play with a variety of stitches to create a bit of a sampler. I used DMC size 8 pearl cotton in ecru for the details and have a feeling I’ll be adding to it as I have time!


