(I am an Amazon Associate and from time to time will use affiliate links for products that I love, or that I think you will find useful. Should you choose to purchase with some of the provided links, I will receive a small commission from Amazon at no cost to you.)
As I wrote about in my last article, Best Practices and Stitches for Hand Embroidering on Clothing, adding stitching to your wardrobe can freshen up clothing to give them new life, whether the embroidery is purely decorative or used for mending. But what about stitching on t-shirts and other stretchy (knit) fabrics? Many of us have closets full of clothing like this, but hand embroidery on knit fabrics can be a bit challenging because of the stretch factor.
Embroidering on t-shirts and similar fabric definitely requires a few extra things to be taken into consideration, but once you get the hang of it, it’s lots of fun!
Use a stabilizer to minimize stretch.
When using a pattern to embroider onto t-shirt fabric, use a stabilizer to minimize distortion of your design. Pellon Ultra Weave Fusible Embroidery Stabilizer is a permanent option and my favorite to iron on the back of your fabric. It adds a bit more structure to the fabric and will minimize distortion if you stretch your fabric through a hoop during embroidery.
Don’t overstretch the fabric if you use a hoop.
If you use an embroidery hoop to stitch a design, don’t make the fabric too taut. Keep in mind that unlike embroidery that will be displayed on your wall, your fabric will need to move and flex, so your stitches need to look neat, even when the fabric isn’t taut. Pull them just until they lay flat but aren’t overly tight, which can cause puckering and pinching of the fabric.
Take care when embroidering high-stretch areas.
Embroidering details around t-shirt sleeves, narrow necklines, or other areas where there will be a lot of stretch should be limited to stitches that will allow for stretch and movement. These stitches include, but aren’t limited to, stitches with spaces between them (ex - whipstitch, running stitches, cretan stitches) or stitches with diagonal lines (ex - cross stitches, fly stitches, herringbone stitches). Experiment on a scrap piece of stretchy fabric to see what you like and how the stitches respond as you stretch the fabric. The last thing you want is a beautifully embroidered t-shirt that you can’t get your head through!
This hand-stitched neckline uses a whipstitch with the knots on the outside for a more raw look. Whipstitches allow for a great deal of stretch on knit fabrics like t-shirts.
Use a tapestry/cross stitch needle.
Tapestry/cross stitch needles work best with t-shirts and other knit fabrics because their rounder tips are meant to slip between threads rather than split them, as would be needed for woven fabrics. As a result, these needles minimize tearing of knit fabrics and are easier to get through the weave.
Hand appliqué with knit fabric is great for t-shirts too!
T-shirts and other knit fabrics don’t fray, which makes them nice to use for hand appliqué. Try the tutorial below to spruce up an old t-shirt!
A t-shirt appliqué project for you to try!
Embroidery and t-shirt appliqué are great ways to add new life to clothing and cover up blemishes such as small holes and stains. These techniques are especially helpful with thrift store finds that are less-than-perfect. Even if you can’t salvage a shirt for wearing, it may be useful to cut up for a t-shirt appliqué project like the one below.
One of the things that makes t-shirt appliqué super-easy is using HeatnBond SoftStretch Lite Iron-On Adhesive, or if you don’t want to embroider at all, try HeatnBond SoftStretch Ultra Iron-On Adhesive. Not only does HeatnBond work as a stabilizer and will keep your t-shirt fabric from stretching as you cut out shapes, it also keeps your fabric edges nice and clean as you press them in place. Once you start using this method to decorate your old t-shirts, I think you’ll find it pretty addictive!
Let’s get started!
Supplies Needed:
Iron and ironing board
Sharp fabric scissors
T-shirts that you want to upcycle (one that will be worn and another that will be cut up for appliqué fabric
HeatnBond SoftStretch Lite Iron-On Adhesive (OR if you do not plan to embroider any details over the t-shirt appliqué, use HeatnBond SoftStretch Ultra Iron-On Adhesive which does not require embroidery/sewing)
Pencil
Stencil(s) that you would like to trace (Download my free peony template here! The leaf shapes on my shirt are from the Alabama Chanin Stitch Book which you can purchase here.)
Thread for embellishment (I am using sashiko thread which is nice and strong for repeated washing)
Tapestry or cross stitch needle to work with your thread
Embroidery scissors
OPTIONAL: Beads for embellishment and a needle that fits through them
Step 1 - Wash your t-shirts.
Before beginning your project, launder your main t-shirt and any others that you will use for t-shirt appliqué fabric. If you normally throw your t-shirts in the dryer, you’ll want to do the same for your t-shirt appliqué fabric so there isn’t any surprise shrinking down the road.
Step 2 - Trace your stencil.
Once you determine what you want your design to be, it’s time to trace your stencil. Take out your HeatnBond SoftStretch Lite Iron-On Adhesive and draw or trace your shape on the paper side. IMPORTANT: This adhesive will be ironed onto the BACK of your t-shirt appliqué fabric so the shape will show up reversed from what the original stencil looks like. Therefore, if you want the peony to face right on your finished t-shirt, trace the left-facing peony so that when it’s flipped over, it will face in the right direction.
Once you’ve traced your shape on the HeatnBond SoftStretch Lite Iron-On Adhesive, cut a circle around the shape, leaving room around your pencil lines.
Step 3 - Plan your design.
Determine where you want the placement of your t-shirt appliqué to be. When appliquéing with t-shirt fabric, it’s important that the grain of your appliqué runs in the same direction as the background fabric in order to maintain the stretch and avoid puckering. Determine how you want the shape positioned in relation to the t-shirt grainlines and then move on to step 4.
Step 4 - Iron on your stencil to your appliqué fabric.
Once your appliqué shape is traced, it needs to be ironed to the BACK of your t-shirt appliqué fabric. The back of the t-shirt fabric looks like the photo below. Before ironing your appliqué template to the back of the t-shirt fabric, however, be sure that the grain is running in the direction you want your shape to face.
Once you are happy with the position of your traced shape, press the HeatnBond SoftStretch Lite Iron-On Adhesive in place following the instructions on the package. The paper part should be facing up toward you.
Step 5 - Cut out appliqué.
Once the HeatnBond SoftStretch Lite Iron-On Adhesive is pressed securely in place, use sharp scissors to cut along your pencil lines so that your applique shapes are all cut out. Gently peel the paper backing from each piece, leaving the adhesive in place.
Step 6 - Lay out design.
Once you have your appliqué shapes cut out, position them on your t-shirt with the shiny adhesive facing down, making sure that the grainlines of the appliqué are running in the same direction as the t-shirt grainlines. Once you are happy with the arrangement, use your iron to press the appliqué shapes to the shirt (see HeatnBond SoftStretch Lite Iron-On Adhesive package for instructions). The adhesive will form a light bond to the fabric so the appliqué will not shift as you stitch to secure the edges.
Step 7 - Secure the appliqué.
Take a length of thread through your needle and tie a double knot with 1/2” (13 mm) tail at one end. You can either leave the knots on the outside of your fabric (Alabama Chanin style) or hide them on the inside of the shirt. Use a running stitch or a whipstitch around the edge of each appliqué piece.
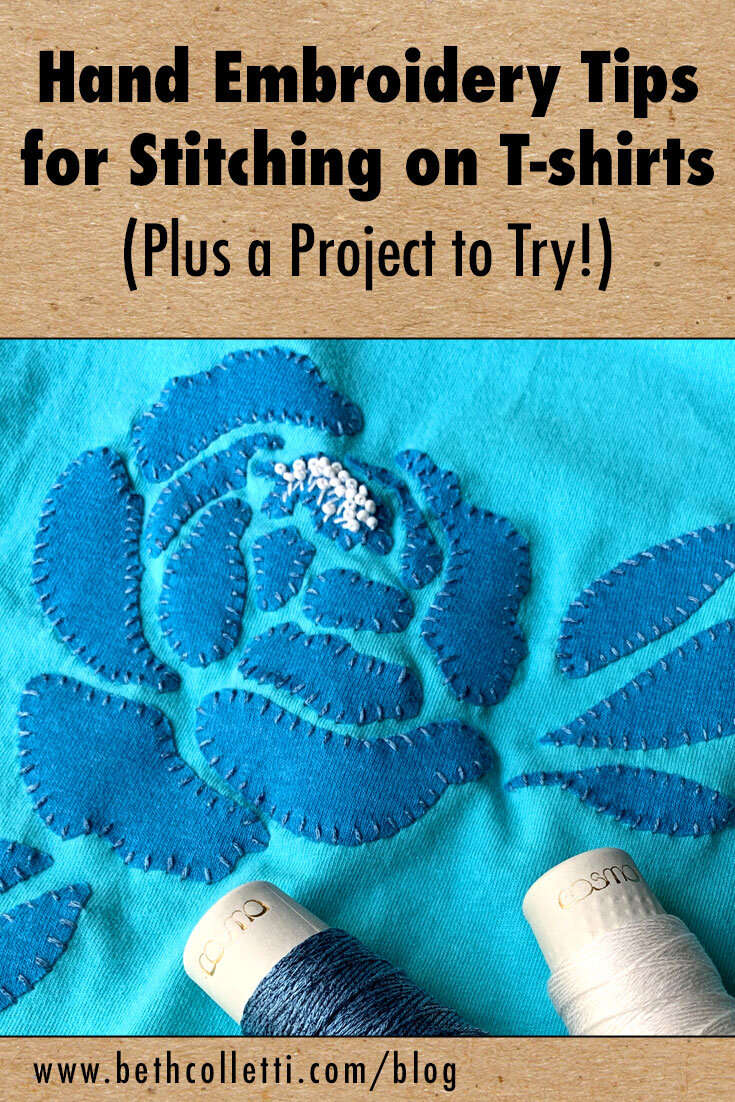
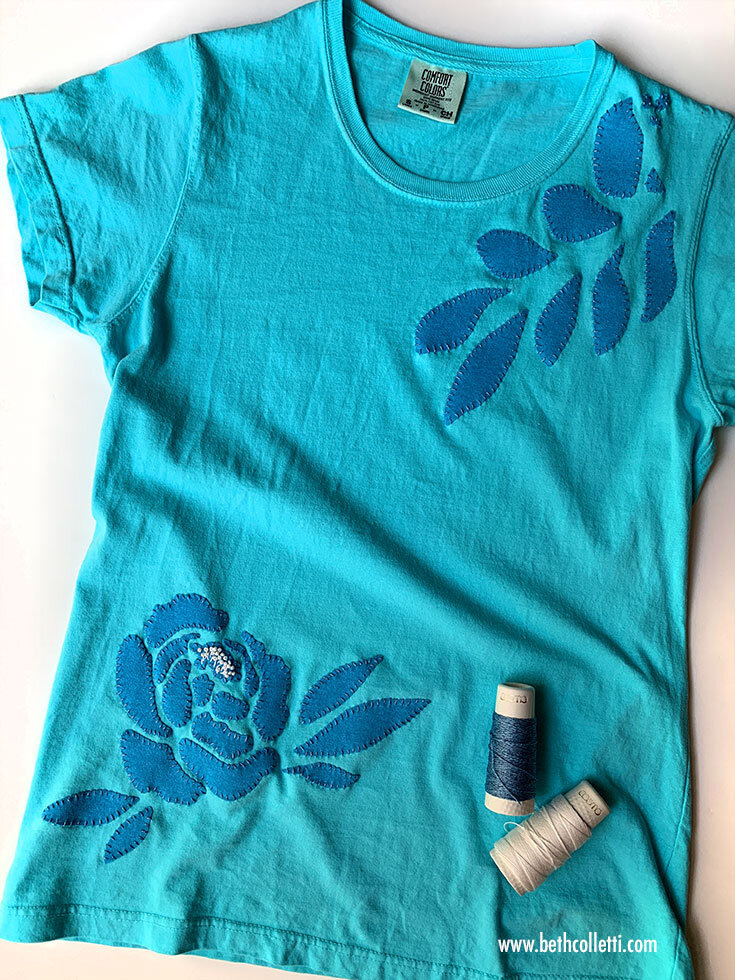
I used a whipstitch to secure my t-shirt appliqué shapes.
A FEW STITCH TIPS: For your t-shirt appliqué, remember that some stitches will allow your t-shirt to stretch and flex more than others. I used a whipstitch to secure the edges of my shapes, which allows for a lot of stretch. The amount of stretch on your appliqué will also depend where on your shirt you stitch it. If you are unsure of how a stitch will stretch, experiment on a scrap piece of t-shirt to see what you like and how the stitches respond as you stretch the fabric.
Keep your stitches between 1/8” and 1/4” (3-6 mm) on both the front and back of the fabric. It’s best to tie off your thread when you finish one shape then to jump longer distances, which may cause the fabric to pucker and cause the long thread to catch on objects. For more tips, take a look at the article Best Practices and Stitches for Hand Embroidering on Clothing.
Step 8 - Add additional embellishments.
Now that your appliqué pieces are securely in place, you can leave it as is, or add additional details if you choose, such as different decorative stitches, sequins, or beads. The Alabama Chanin Stitch Book has lots of inspiration and ideas for how to tackle these sorts of embellishments.


